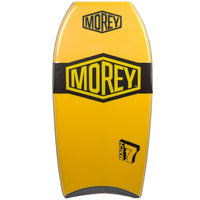
Morey Mach 7 42" Bodyboard
Morey
THE BASICS If you're looking for the perfect mid-range bodyboard, look no further. Built by Morey (the company that invented the boogie board in t...
View full detailsHowever, you may not know that shaping a bodyboard is relatively easy and cost-efficient.
In fact, it can be done over a matter of days, with just a bit of cheap materials and some handiness.
Let's explore how you can shape your own custom bodyboard, and turn your dream into a reality.

Before getting started with shaping a bodyboard, you'll need to develop your bodyboard design.
Luckily for you, there's tons of amazing options and styles available in the market right now!
Like everything in this process, each step is totally up to you. You can either choose an existing design or come up with your own.
However, whatever design you select should resonate with how you prefer to ride - whether that's drop-knee, lay flat, or even standup.
Once you've gotten the basic shape figured out, it's time to choose an appropriate core type for your boogie board.
If you ride primarily in warm waters, you can go with the lighter and more durable Polypropylene (PP) core.
However, if you consider yourself an all-climate daredevil, you can choose the more apt Polyethylene (PE) core for a more flexible experience. PE cores work great in varying water temperatures.
Alternatively, you could opt for other core types such as EPS or even cork. We won't dive into quite all the core types in this article, but you can read more about the different bodyboard core types here.
Now that you have chosen a core material, it is time to draw the lines and get to cutting!
Before you start drawing the entire design on the workpiece, you'll need to draw a central line to keep everything level.
Then, it's time to draw the rest of the design onto the board, and set the perfect rail configuration.
Professionals recommend choosing a 60/40 rail configuration if you're into riding bigger waves and enjoying heavier rides.
However, a 50/50 configuration will be suitable for the majority of your rides.
As with all custom bodyboards, your final choice for both core material and rail configuration will depend upon your personal preferences and riding style.
We definitely recommend trying out a few bodyboards with varying configurations before making a final choice - these components can make a world of a difference for experienced riders.
Now that you've laid down the design, it's time to start cutting your bodyboard.
We'll start by chopping off any unwanted odds and ends from the board material.
Then, we'll smoothen the edges with a portable planer.
When smoothing the edges of the board, make sure you're being very exacting. You'll want to make sure you get the right rail configuration.
Don't work on one side too much without taking a step back and looking at the boogie board from afar.
Once you've chopped off all unnecessary parts from the bodyboard, it's time for a final sanding.
We recommend using some fine grit sandpaper to get rid of those rough edges.
How's the board looking?
By now, you should have smooth edges and rail lines from nose to tail.
Apply some more fine-grit sandpaper wherever you see any rough edges or surfaces.
Once you're done with rail lines, it is time to cut the nose curve at 175 degrees.
To do this, mark both nose bulbs to ensure the board is completely even.
Insert the nose bulbs, then reapply the planer and sandpaper to both nose and channels until you've got the design you want.
The only items left now are choosing your tail design, slick material and board length.
If you're unsure of the right board length for you, check out our Bodyboard Size Calculator. This should give a good range of what lengths you should be shooting for. Additionally, check out our Bodyboard Size Guide if you prefer a chart instead.
From here, it's time to choose your tail design. You can choose either a Crescent Tail or Bat Tail (or a variant of either, such as the Flat Bat Tail).
Generally speaking, a crescent tail is recommended for most riders, with a bat tail being used primarily for dropknee riding.
Crescent tail bodyboards offer more stability and a smoother ride, due to having less contact with the wave.
You can learn more about the different types of tail designs here to figure out the best tail shape for you.
Now that we've got our nose bulbs in, and our bodyboard is starting to take shape, it's time to lay the slick.
Much like the bodyboard's core, the slick can be a variety of different materials, from HDPE (or high density polyethylene) to Surlyn.
Surlyn slicks are often referred to as one of the best available slick types available. You can learn more about slick types here.
Lay the slick sheet over the bottom of the board, and begin heat laminating it. Gently press down all along the slick, slowly removing any air bubbles that come up.
Then, cut off any excess slick material, and use fine grit sandpaper to sand down any sharp areas.
You can add tail bumpers to further protect your design from knee impact and water.
If you made it to the end, congratulations! It's time to get that new custom bodyboard on the water!
Take your board to your nearest spot, apply wax if preferred, and get to riding.
If something doesn't feel quite right, you can always head back and modify each component, or shape a new board if necessary.
Need some inspiration? Watch as bodyboard shaper Jarrod Gibson gives an inside look into his process. Then, check out bodyboard shaper Dan Sivess of Pride Bodyboards.