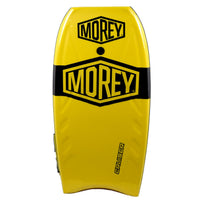
Morey Cruiser 42.5" Bodyboard
Morey
THE BASICS Want to get into bodyboarding on a budget? The Morey Cruiser was made for you. → LARGER RIDER? Check out the Morey Big Kahuna. → WANT ...
View full details
Before we dive into the details, it's important to know all the parts of a board.
If you're familiar with board construction, you can skip ahead. Alternatively, you can click on one of these section links to learn more about the individual board part.

Don't want to read all about the parts of a bodyboard? No worries. We've made a quick flowchart to give you a start on your bodyboard search:
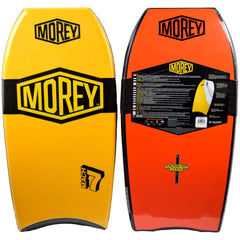
So, what exactly is a Power Rod Stringer?
A Power Rod Stringer is essentially a tube that goes down the middle of the board. This tube allows for greater strength and durability to the board - essentially, it's not going to break on you as easily.
So only Morey boards have stringers?
Nope! Stringers are on several brands of boards. It's just that some Morey boards call it the "Power Rod Stringer".
In fact, you're likely to see stringers on most mid- to pro-level boards. Stringers in boards can be made up of various materials. The general gist is that they're flexible, pliable tubes or rods inside the core of your bodyboard.
Generally, there's a few ways stringers are setup inside the core of your bodyboard.
1. The Single-Stringer Setup
The first way is the simplistic one: one single, pliable stringer down the middle of the board.
This is the way the Big Kahuna is designed.
This setup gives more durability and flex than boards without stringers, but has less durability than the two setups below.
2. The Double-Stringer Setup
There's also the two-stringer design, with one slightly to the left of the center and one slightly to the right of the center.
The double-stringer setup has more durability than a single stringer, with less durability than the triple-stringer setup.
3. The Triple-Stringer Setup
Last but not least, there's the three-stringer design, which is a combo of the two-stringer design combined with the aforementioned central stringer.
The triple-stringer setup has the most durability of all stringer types.
Generally, stringers are made up of fiberglass and carbon fiber. However, a few companies have their own proprietary stringer materials.
The ones in the Big Kahuna are made of a dual composite carbon strength tube.
Generally, most bodyboarders fall into three categories.
1. The Newbie - If you're just starting out with bodyboarding, we always advise to start small and move your way up.
You don't want to buy a board too advanced to start out with, so an entry- or mid-level Morey will give you a good start.
You can often get these with single-stringer setups. However, any bodyboard with a single-stringer setup should be good enough.
2. The Hobby Boarder - If you're bodyboarding on a regular basis, but not ready to call yourself a pro yet, you have a few options:
Ultimately, it's going to depend on your budget and if you plan on going pro soon.
3. The Pro - If you're out there bodyboarding on a daily basis, you're likely going to want a triple-stringer setup or ISS (explained below).
While it's ultimately going to depend on a variety of factors including budget and average water temperature in your area, three stringers are often the most popular setup for pro riders.
This is where it gets cool.
Depending on your board, it may support the ability to swap out stringers.
That means depending on water temperatures or conditions, you can essentially swap out stringers per-session and dynamically change your board to meet your needs.
All you have to do is insert the stringer, turn the key, and head out!
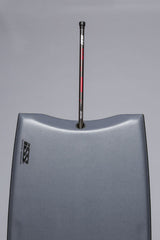
This nifty invention is called an ISS, or Interchangeable Stringer System. You can learn more about it here.
And this is where it's extremely important to get a board that supports this setup. While the Big Kahuna may not, several pro-level boards do.
Very carefully! Before installing a leash plug, we recommend checking exactly where your stringers are, and if your board is a 1, 2, or 3-stringer setup.
You can check out how to install a leash plug and leash here.
We can't mention stringers without mentioning mesh.
Some boards have a mesh inlay either between the deck and the core or between the slick and the core.
If you're looking at boards in the higher-end range, you're likely to see this option on a few of them.
We recommend getting mesh if it's an option for you - it'll strengthen the board a bit more and increase board life.
Now that we've gone over stringers, we've got to discuss cores.
The core is essentially the heart of the bodyboard.
This bodyboard foam keeps the board buoyant, and can give it varying strengths and performance gains in all kinds of surf conditions and temperatures.
There are lots of core types out there, some proprietary. For now, we're going to dive into some of the most popular types:
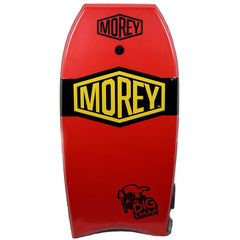 The technical name of this core is Extruded Polystyrene. This is the type of core that you're going to see in a lot of lower- to mid-range boards. This material is light and cheap, hence why you see it on more entry- to mid-level boards. Without stringers and other setups, EPS cores generally aren't as good compared to most boards due to durability issues. However, pair it with a stringer and you're able to have improved flex, which will greatly help its durability.
For newbie bodyboarders, we recommend EPS cores (with stringers if possible) due to a decent price to performance ratio.
The PP core is also known as a Polypro core, or commonly in BZ boards, a Zero-G core.
Polypropelene, is a light material core that's become fairly popular on high-level boards.
There's a few different types of a PP core, though the most popular nowadays is of a beaded foam.

This material, due to being light and dense, gives it popularity for being fast on waves, and combined with stringers on many boards, allow it to be a durable and high-performance choice.
That being said, the PP core also often comes at the highest price point.
A PE Core, technically called Polyethylene, and also sometimes called a DOW core, is another very common core type.
While it's going to be heavier than PP core boards (read: slower), in cold waters they're often popular.
This is because cold water allows the core to be a lot more stiff and dense.
PE Cores perform best in warmer water temperatures.

Due to this density, flex is going to be a bit of an issue - hence why we'd recommend stringers with this core type. However, this density also gives this core type a lot more buoyancy.
Note, however, that a lot of boards with this core type will feature stringers.
Riding on a PE core is different than a PP core, you will want to use the heaviness and weight of this board type to propel you. These boards have become quite popular on large waves and more advanced boarding.
PE cores also come out good in a price-to-performance scenario for providing a good ride without being quite as expensive as a PP core.
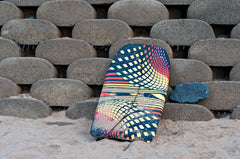
The Polystyrene Core is generally the type of core you'll see on really cheap boards (think touristy beach shops). These boards likely won't last too long, and they break a lot easier than higher-level bodyboards.
Generally, you're going to see these types of boards covered with fabric, and they're around $20.
Remember those hibiscus print boards? Yep, chances are that's a Polystyrene board.
We don't recommend polystyrene cores for anyone, even a newbie, as long as you have the budget to go for an EPS core. You're much better off getting an entry-level EPS board as it'll last you at least a few sessions.
For the entry-level boarder: Go with EPS. For either water temperature.
For the advanced- or pro-level boarder: If you're in warm waters, and want to go fast go with PP.
If you're in cold waters, and you're okay with having a denser board, go with PE.
However, this decision is ultimately going to depend on a variety of factors, such as stringer setup, and personal preference in regards to ride type and what the waves are like around you.
This ultimately depends on what type of ride you want to have, but yes, in general, more flex and lighter weight is better. You're going to get more durability and easier maneuverability.
That being said, you can aim for a less-flexible board if you prefer to have rigidity in your ride. You may have a different ride style and this all depends on what kind of ride you like.
If you prefer to ride fast and maneuver quickly, you're going to want a flexible, light board.
The nose is the top tip of your bodyboard. Most bodyboard noses are the same, so no need to worry too much about this one!
Nose Bulbs are the name for grips or contours on the opposite end of your board, to assist with grip.
While this is an excellent feature to have, you may not see it on a lot of more entry-level boards.
If you're a newbie rider, while helpful, this feature isn't a must-have.
However, if you see a board that features this in your price range, go for it! More options to assist with your riding experience are always worth it.
Contours are the inlays on the deck of your board that give your hands and elbows some extra grip.
They vary greatly from board to board, but the main takeaway is they're going to give you more grip than a board with no contours.

We recommend even newbies get boards with contours. If you're a newbie, they'll assist you with hand and elbow placement on your board.
If you're a more advanced or pro rider, you likely have your own preferences for contours and which are best for you.
Definitely check what's out there in terms of design and pick out a board that has the best contours for your ride style.
There's two common types of board slicks. These are HDPE and Surlyn®.
HDPE Slicks are common in entry- to mid-level boards. It's used because it's a cheaper plastic.
It's relatively durable, and it'll give you a solid ride.
Over time, it'll degrade faster, or crease more often than Surlyn®, but you're only going to see a measurable difference here if you're an advanced or pro-level boarder, or if you're a larger bodyboarder.
If you're a newbie or are more price-conscious, HDPE should work fine for you.
Surlyn® Slicks are the best of the best on the market right now.
This material is more expensive than HDPE, with the benefit of it being a better material. You may have seen Surlyn® before, it's the material made by DOW that covers golf balls.
You'll see it on a lot of pro-level boards, as pros often prefer Surlyn®.
You're going to get some added performance and durability here, so it may be worth the added cost if you are aiming for a longer board life.
The bodyboard's deck, or skin, is the material that covers the top of the board where you ride.
The most common rail skin types are PE, or polyethelene skins, and crosslink skins.
This is the same material a lot of good boards' cores are made of.
Also referred to as PE or H-Cell, it's a great fit, and luckily, lots of boards use these skins nowadays. They're a relatively common deck skin type.
We recommend polyethylene skins for the best performance.
Crosslink skins are an alternative type of rail skin, not as common as PE but they're denser and have less water absorption.
This is common in cheaper boards. It comes in a few types, ranging from thin to thick.
The thicker the crosslink material, the worse the performance due to significantly impairing the board's ability to flex.
A thin crosslink skin is fine if you're on a budget or a new rider.
Rails are essentially the edges of the board. They're going to give you the maneuverability and speed based on what you're looking for.
There's two common types of rails: 60/40 and 50/50.
These numbers signify the ratio between the rail and the chine - the chine being the part on the top of the board connected to the board's deck.
If your rail is 60/40, this means 60% of your rail is in direct contact with the water, with the chine connected to the deck at the top being 40%.
60/40 rails are common on several boards.
This rail type is going to give you added maneuverability and control at the cost of a lower speed.
60/40 rails are also some of the most popular rail types on big waves.
50/50 rails are also a common rail type.
They're going to give you less control than 60/40 rails, but a faster speed.
Now that we've covered rails, let's cover tails!
There's two main types of tails. These are the Bat Tail and Crescent Tail.
The Bat Tail is common on Hubboards boards, and the Crescent Tail is common on a lot of boards, most notably on Morey and BZ boards.
Tail type won't matter for most new boarders, but we recommend trying both out and choosing which one is best for your ride style.
Used as the tail type on the first bodyboards made by Morey, the Crescent Tail is going to help for riders that like drop knee riding.
It doesn't have as much control, but it will quickly turn if you turn abruptly. This is a more common tail type due to being a good tail design in varying types of conditions.
We recommend the Crescent Tail for most boarders.
Bat tails are a lot more common when prone boarding, or bodyboarding on the knees.
They're not as common, but you'll see them on a lot of Hubboards boards. It's a looser ride than the Crescent Tail, but you'll get more speed.
Bat tails are often recommended in smaller or more unpredictable waves.
We recommend bat tails for more advanced or pro-level boarders, looking for a good board for prone boarding.
Other boarders should look into a Crescent Tail or a variation of a Crescent Tail.
Much like the name, channels are the grooves that move from the tail of the board upwards, gradually becoming less and less deep as you approach the middle or top of the board.
They're going to give you more maneuverability and control. Most board channels don't differ too much; however, if you have deeper channels, you're going to have more control at the cost of speed.
Channels tend to make a larger difference if you're in big-wave conditions.
Boards range a decent amount in thickness and width. The thicker (and wider) a board is, the heavier it is, making it more buoyant at the cost of speed.
A thinner/less wide board is better for large waves, as it's going to give you the speed and maneuverability.
A thicker/wider board is better for small waves, as it'll give you the buoyancy to stay afloat, at the cost of a slower ride.
When selecting a bodyboard, you're going to run into some variation in how flat the board is when standing up.
This is called the board's rocker.
It's going to range from completely straight to slightly curved. Keep in mind that when we speak about curve, we're talking about a concave board curve. You want to avoid a convex curve at all costs - this means there's something wrong with your board. Likely it was exposed to heat or sunlight too much.
Flat rockers increase speed, at the cost of control. You want to aim for a pretty flat rocker overall.
We recommend buying a flat rocker board, as it's generally preferred.
Some boards have a bit more curved rockers, although this is rarer. This is going to give you less speed, but a bit more control.
However, too much of a curved rocker will have a ton of drag and impact your performance quite a bit.
Bumpers are often placed along the edges of a bodyboard. You're going to see bumpers more on mid- to pro-level boards. They help bolster the ends of your board to protect it. After all, boards take quite a beating from the waves!
We recommend getting a board with bumpers if possible - it'll help with your board's durability and result in increased board life.
Choosing the right length of bodyboard ultimately depends on your height and weight. You can view our size guide here, or automatically select boards that are good fits for you with our size calculator here.
Now that we've gone over everything you should need to select a bodyboard, it's important to discuss some common ways boards break quickly, and how to prevent them.
One of the most common questions we get is, "How do I keep my board safe while I travel?" While this ultimately depends on how you're traveling, you will want to make sure your board is well-protected.
This often means getting a solid bodyboard bag to hold your board. Brand doesn't matter too much here. As always, generally higher price points mean better durability and life. However, as long as the bag's keeping your board from the elements, and has solid edges to keep your board from snapping, you should be good.
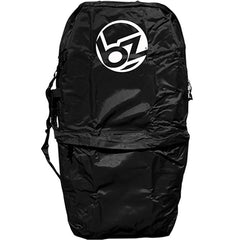 When you're traveling in the car, we recommend not packing items on top of your board. It's best to lie your board on top of things if possible, but be careful not to have it bend at all. An alternative method is to use a more advanced travel bag with wheels and reinforced padding. These bags are more like duffel bags in appearance, and will really keep your board protected.
Yet another way is to strap your board to the top of the car, much like a surfboard.
Remember to have it covered in a board sock or other form of protection, however!
This should only be used as a last resort in shorter trips, as heat and sunlight are bad for a board.
Not only is duck diving fun, but it'll also help with board life over time. Learn to duck dive by reading our quick guide here.
Alternatively, you can watch this quick video!
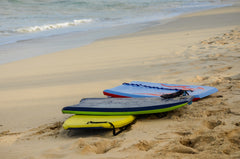 There's obviously going to be times in between sessions where you may want to chill at the beach, or potentially while traveling, you have your board strapped to the top of the car. Keep in mind, however, that heat and sunlight (especially paired with saltwater) are extremely bad for a board. You want to keep your board insulated.
Leaving your board in direct sunlight will result in bending, warping, expansion and air pockets - four things you definitely do not want in a board!
We recommend getting an insulated board bag, and then leaving that insulated bag under your umbrella. If it's not under an umbrella, direct sunlight will still heat the board bag up and thus invalidate its use.
If you have no other options, covering the board with a beach towel will help a tiny bit, but once again, if this is over an extended period of time, won't help your board from degrading.
When you get back from your session, ALWAYS rinse the board in fresh water. Salt water and sand will degrade your board over time, especially if it's not rinsed afterwards.
Then, place your board on the ground flat, out of the heat and sunlight, preferably indoors.
A good place is under your bed.
It's a flat surface, and it's nice and out of the heat!
Avoid dragging your board on shells, sand or pavement. Doing so will scratch up your slick greatly, in addition to likely bending your board over time, which will ruin its performance and degrade the board a lot quicker.
The same rule applies for jumping onto your board and riding it like a skimboard. This is not what bodyboards were built for, and over time, a board will degrade much quicker due to this damaging the board's core. We recommend picking up a skimboard as well if you like to ride in this style.
Using your board to tow along on a boat or jet ski isn't a good idea, either. We recommend tow inflatables for that purpose.
When you're heading back in from a session, simply carry your board on the way back, preferably in that board bag we discussed earlier!
You're going to want to avoid bending your board at all costs. Keeping the board flat is key to having a solid ride, as mentioned earlier. This means never trying to flex the board, and never placing objects on top of the board that weigh it down while not in use.
Always store your board flat and in a cool, out-of-sunlight area. It's best to never store your board on the nose or tail, as this puts excess pressure on one end, and can lead to unwanted bending or warping.
Some boarders prefer to wax their boards. Personally, we don't wax our boards, but this shouldn't deter you from waxing. Several pros do and several pros don't.
You can wax the board along the rails, as well as where you hold the board and anywhere where you touch the board. You can check out our guide on board waxing here.
Even if you choose not to wax your board, you may want to wax your board before your first ride. This is because when the boards come new from the manufacturer, they have a thin coating to protect their foam during shipment. This makes your ride slippery, so the wax should help that fairly quickly!
Before going out on your first session, you're going to want to have a few things handy.
Make sure you have a leash. Seriously. No bodyboarder should ever head out there without a leash.
Leashes will not only protect your board, but it'll protect other people as well.
Depending on your style, you can go with either a wrist leash, a bicep coil leash, or an ankle leash.
Wrist leashes are good for beginners.
Bicep coil leashes and ankle leashes are more preferred among some advanced and pro-level boarders. It all depends on ride style, whether you're dropknee or prone, or simply where you like a leash to be attached.
You'll want to test out a few leashes to get a feel for where you like to place your leash before deciding on a good leash for you.
You can check out our guide on choosing a good leash here.
If you want to protect your board, we recommend purchasing a board bag as mentioned above. It'll keep your board protected in the sun (remember to keep it under an umbrella!) a lot more than if it was just left out, and this'll help greatly with board life.
If you want to up your bodyboarding game, swimfins are a must. They're going to allow you to propel yourself quickly and keep momentum going. If you want to find out what fins are best for you, you can check out our guide on choosing bodyboarding fins here.
If you're a newbie and just want to test some fins out, Churchill Fins are pretty great all-around fins.
Keep in mind that bodyboarding fins and bodysurfing fins are different, and there's lots of different fin types and materials to check for when selecting the best fin!
For your initial bodyboarding session on your new board, we recommend waxing it. Here's why.
When you get your brand new board, manufacturers often have a protective coating on the board before sending it out for shipment. After all, they want to keep that board pristine until it reaches you!
However, this coating is extremely slippery, and you're really going to feel this on your first few sessions. If you wax your board (and dewax it after each session!), you're going to immediately feel some improvement.
If you're new to board waxing, or just want a refresher on it, you can check out our guide to waxing and dewaxing a bodyboard here.
And that's it! If you've got any questions on selecting the right board, feel free to hit us up via live chat, email, or phone. We're always here to help you find the best board.