How to Install a Bodyboard Leash and Plug
Whether you're new to bodyboarding or just need a refresher, this simple guide should help you install your new bodyboard leash setup on any board.
DIFFICULTY LEVEL: Novice
ESTIMATED TIME: 5-10 minutes (with plug), 1-2 minutes (leash only)
ITEMS REQUIRED: Ruler, marker or pencil, screwdriver, lighter (optional), leash, leash plug

Nowadays, a lot of boards don't come with a leash.
This is typically more common on more mid- and pro-level boards, but some low-cost boards don't include a leash, either.
This means you'll have to install the leash yourself.
Luckily, it'll only take about five to ten minutes.
You'll need the following tools:
- Ruler
- Marker or Pencil
- Screwdriver (or Drill)
You may want these tools also:
- Coin (a quarter will work fine)
- Lighter
To get started, you'll want to install the leash plug. A lot of boards nowadays include a leash plug, but some you'll still need to install manually.
To start, you'll want to determine exactly where to fit your leash plug.
This ultimately depends on what side you prefer to attach your leash to, as well as if you prefer to use a wrist leash or ankle leash.
HOW TO INSTALL A BODYBOARD LEASH PLUG
1. FINDING THE SPOT
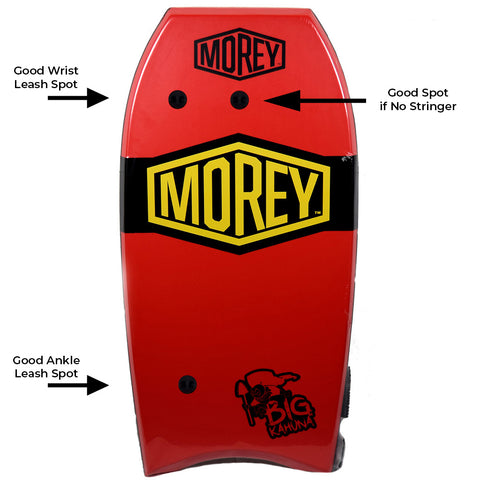
If you're a regular stance rider (left side leash): Place your plug around 8 inches from the top-left corner, and a few inches inwards from the left end.
If you're a goofy footed rider (right side leash): Place your plug around 8 inches from the top-right corner, and a few inches inwards from the right end.
Note: If you prefer using an ankle leash, simply use bottom-left or bottom-right corner, respectively.
Now that you've found a good spot, make sure that you're not placing it over the stringer.
If you're unfamiliar, this is the solid part that travels down the board's core.
You want to avoid placing the plug on top of the stringer, but a few inches away on either the left or right of it should work fine.
Then, go ahead and mark the middle of that spot with your marker.
2. DRILLING THE HOLE
Now, use your lighter if desired to heat up the screwdriver, and twist it into the board repeatedly until you've almost reached the slick (the hard end of the board that touches the water).
Alternatively, if you prefer using some powertools, now's the time to get the drill out and use it to drill the hole instead.
Be careful to only get to the slick and not drill through it.
Use the screwdriver to manually drill through the slick to prevent damage.
Slowly keep twisting through the deck (the back of the board), and gently make the hole a bit bigger, no more than 1/2" or so.
3. FITTING THE PLUG
Now that you've drilled your hole, you can screw in both pieces of your leash plug.
Push the string end of the plug into the non-deck side of your board, then screw it on to the non-string end of the plug on the back.
You'll want to make sure this is screwed in pretty tightly together. Remember, these are gonna be handling some rough waves!
You can use a quarter if you'd like to ensure that it's super tight.
Now that your plug is fully installed, skip to the leash section!
HOW TO INSTALL A BODYBOARD LEASH
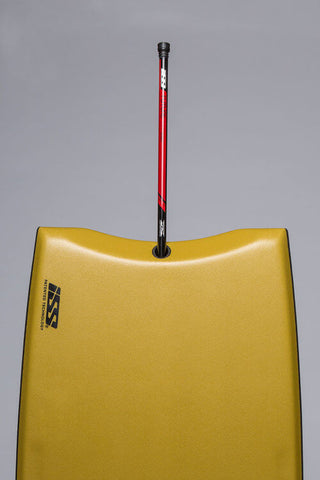
More of a visual learner? Click here to view the full-size tying guide.

1. FITTING THE STRING
Your leash cord will include a thin end of string. Place this string through the leash plug's center, on the rider side.
2. TYING THE KNOT
You're going to want to tie a tight knot with this string.
You can use your knot of choice, however, we recommend using a simple overhand knot.
This is done by putting the loop of the string inside the two ends on the other side, then pulling to ensure the knot is snug.
3. FITTING THE LEASH
Now that it's all good and installed, it's time to fit the leash.
Wrap the leash around your ankle or wrist (based on your chosen install point earlier) and determine the best tightness.
You'll want it snug enough to hold even when the board moves quickly, but not too tight.
Experiment and find the best tightness before going out on your first session with your new leash!
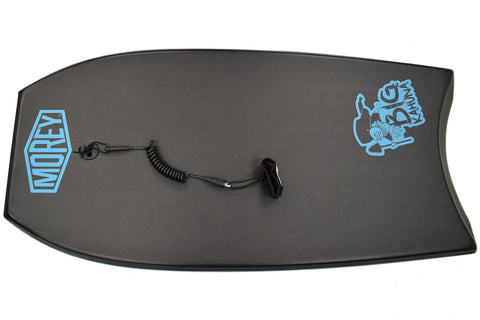
Now you're all done! Your leash should look like the image above.
Double-check once again to ensure your knot is tight and you're ready to go. Enjoy your session!